Does your home’s interior suffer from unsightly oil stains on the walls? Dealing with this problem can be a daunting task, as you want to remove these blemishes without damaging your paint.
This blog post will guide you through effective tips and tricks for painting over oil stains, factors to consider when removing the stains, pitfalls to steer clear of during removal, and preventive measures for future protection.
Ready to say goodbye to those stubborn wall stains? Read on!
Key Takeaways
- Prepare the walls properly by cleaning them thoroughly and removing any loose or peeling paint before painting over oil stains.
- Use a stain-blocking primer to create a barrier between the stain and the new paint, preventing discoloration or bleed-through.
- Choose the right type of paint, such as latex or water-based, designed for covering stains and providing good coverage.
- Apply multiple coats of paint with sufficient drying time in between to ensure full coverage and a smooth finish.
- Avoid using abrasive cleaners or tools that can damage the walls when removing oil stains.
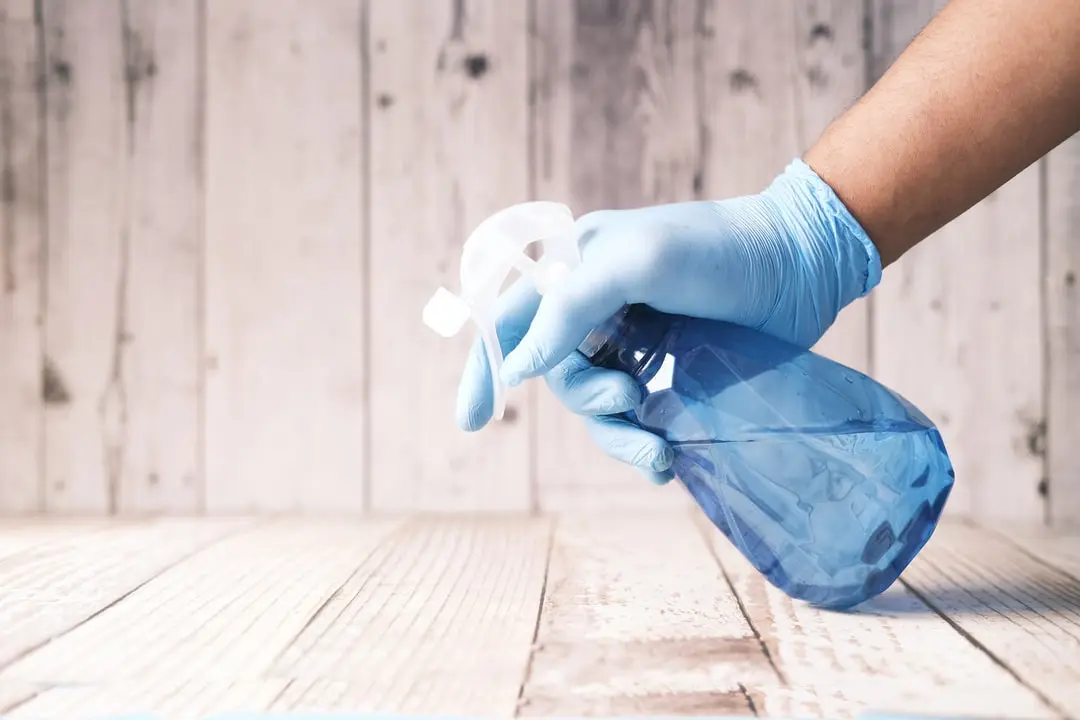
- Gently scrub the stains with mild dish soap and warm water, avoiding excessive pressure that could harm the walls.
- Properly prepare the walls before cleaning by removing dust and protecting surrounding surfaces to prevent accidental damage.
- Take preventive measures like using protective coverings while cooking, cleaning up spills immediately, and regularly maintaining your walls to prevent future oil stains.
Effective Tips and Tricks for Successfully Painting Over Oil Stains on Walls
Prepare the walls properly by cleaning them thoroughly and removing any loose or peeling paint.
1. Prepare the walls properly before painting
Getting a wall ready for painting means doing the right things. Oil stains can be tough, but you can get rid of them. Use these steps:
- First, look at the whole wall. See how big the oil stain is.
- Next, put on gloves to keep your hands clean.
- Use a soft cloth or sponge with warm water and mild soap to wipe off dust and dirt.
- Then, get a good cleaner that fights grease to take care of the oil stain. This will help break down the oil so it’s easier to remove.
- Make sure you don’t scrub too hard! That might damage the paint already on the wall.
- After you clean, let the wall dry completely before you start painting.
2. Use a stain-blocking primer
To effectively paint over oil stains on your walls, it’s important to use a stain-blocking primer. This type of primer creates a barrier between the stain and the new paint, preventing any discoloration or bleed-through.

It helps ensure that the paint adheres properly and gives you a smooth, even finish. Before applying the primer, make sure to clean the walls thoroughly to remove any dirt or grease buildup.
Once cleaned, apply the stain-blocking primer directly onto the stained areas using a brush or roller. Allow it to dry completely before moving on to painting. Remember, using a stain-blocking primer is an essential step in successfully covering up oil stains on your walls and achieving professional-looking results.
3. Choose the right type of paint
When painting over oil stains on your walls, it is important to choose the right type of paint. Look for high-quality paint that is specifically designed to cover stains and provide good coverage.
Opt for latex or water-based paint, as they are easier to clean up and have low levels of volatile organic compounds (VOCs). Consider using a stain-blocking primer as well, which will help prevent any residual oil from seeping through the paint.
Remember to follow the manufacturer’s instructions when applying the paint and allow sufficient drying time between coats. By selecting the appropriate paint, you can ensure a successful and long-lasting result.
4. Apply multiple coats of paint
To effectively paint over oil stains on your walls, applying multiple coats of paint is crucial. This ensures that the stain is fully covered and doesn’t bleed through the new paint.
Start by preparing the walls properly and using a stain-blocking primer for better coverage. Choose the right type of paint, such as an oil-based or latex-based paint depending on your wall surface.
Allow each coat to dry thoroughly before applying another one to get a smooth and even finish. By applying multiple coats of paint, you can successfully hide those stubborn oil stains and enjoy a fresh-looking wall again.
5. Allow sufficient drying time between coats
Make sure to give each coat of paint enough time to dry before applying the next one. This is important because if you don’t allow enough drying time, the layers of paint can become uneven or smudged.
It’s best to follow the instructions on the paint can for recommended drying times. This will ensure that your final result is smooth and professional-looking. Patience is key when it comes to painting over oil stains on walls!
6. Use the right painting techniques
To successfully paint over oil stains on your walls, it’s important to use the right techniques. Start by cleaning the stained areas with a degreaser or mild detergent solution to remove any dirt or grime.
Next, make sure to prime the stained areas with a stain-blocking primer before applying paint. This will help prevent the oil stains from bleeding through and affecting the new paint job.
When applying the paint, use smooth and even brush strokes or a roller for a seamless finish. Allow each coat of paint to dry completely before applying additional coats for better coverage.
Factors to Consider When Removing Oil Stains from Walls

When removing oil stains from walls, it is important to consider the type of oil stain, and the condition of the walls, and choose the appropriate cleaning method and products.
1. Identify the type of oil stain
To effectively remove oil stains from your walls, it’s important to first identify the type of oil stain you’re dealing with. This can help determine the best cleaning method and products to use.
Factors to consider when identifying the oil stain include the source of the stain (such as cooking oil or grease), the color and texture of the stain, and any accompanying odor. By understanding what type of oil stain you have, you can choose a suitable cleaning solution and technique for optimal results.
2. Consider the condition of the walls
Before removing oil stains from your walls, it’s important to consider the condition of the walls. This includes assessing if there are any existing damages or cracks in the paint or plaster.
If there are, you may need to address those issues first before attempting to remove the stains. Additionally, older or porous walls may absorb oils more easily and require different cleaning approaches compared to newer walls.
By taking into account the condition of your walls, you can ensure that you choose the appropriate cleaning method and products to effectively remove oil stains without causing further damage.
3. Choose the appropriate cleaning method and products
To successfully remove oil stains from walls, it’s important to use the right cleaning method and products. Here are some tips to help you choose the appropriate approach:
- Identify the type of oil stain: Different types of oil stains may require different cleaning methods. For example, cooking oil stains may be easier to remove than grease stains from machinery.
- Consider the condition of the walls: Before selecting a cleaning method, assess the condition of the walls. If they are painted, you’ll need to use a gentler approach to avoid damaging the paint.
- Choose suitable cleaning products: Depending on the type of oil stain and wall surface, you can use various cleaning products such as vinegar solution, grease-fighting cleaners, dish soap mixed with hot water, rubbing alcohol, or baking soda paste.
- Test the cleaning solution first: Before applying any product directly to the stain, test it on a small hidden area to ensure it doesn’t cause discoloration or damage.
- Follow proper cleaning techniques: Gently apply the chosen cleaning solution to the stain using a sponge or cloth. Avoid scrubbing too vigorously as this may spread the stain or damage the paint.
- Rinse and wipe dry: After treating the stain, rinse the area with clean water and wipe it dry with a soft cloth or towel.
4. Test the cleaning solution on a small area first
Before tackling the oil stains on your walls, it’s essential to test the cleaning solution on a small area first. This will help you determine if the solution is safe for your particular wall surface and prevent any potential damage or discoloration.

Remember, different types of paint and finishes may react differently to cleaning solutions. By conducting this test, you can ensure that the cleaning process doesn’t cause any unwanted effects and proceed with confidence in removing those stubborn oil stains from your walls effectively.
Mistakes to Avoid When Removing Oil Stains from Walls

Using abrasive cleaners or tools can damage the walls and should be avoided. Vigorously scrubbing the stains can spread the stain or damage the paint, so it is important to be gentle when cleaning.
Properly preparing the walls before cleaning and allowing enough time for the cleaning solution to work are also key steps to avoid mistakes in removing oil stains from walls.
1. Using abrasive cleaners or tools that can damage the walls
- Avoid using harsh chemicals or abrasive cleaners on the walls as they can cause damage to the paint and surface.
- Instead, opt for gentle cleaning solutions such as a mixture of mild dish soap and warm water.
- Use a soft cloth or sponge to gently scrub the oil stains, avoiding excessive pressure that could harm the walls.
- If necessary, you can try using a non-abrasive scrub brush with soft bristles for tougher stains, but be cautious not to apply too much force.
- Always test any cleaning solution or tool on a small inconspicuous area of the wall first to ensure it does not cause any damage.
- When cleaning, rinse the walls thoroughly with clean water and dry them completely to prevent streaks or water marks.
2. Scrubbing the stains vigorously, which can spread the stain or damage the paint
Scrubbing the stains on the walls too hard can make the stain spread or ruin the paint. Instead, use gentle and controlled motions when cleaning. Avoid using harsh cleaners or abrasive tools that can harm the walls.
It’s important to be patient and give enough time for the cleaning solution to work effectively. Remember, you want to remove the stain without causing further damage to your walls.
Additionally, if scrubbing doesn’t seem to be working or if you’re unsure about how to properly clean oil stains from your walls, it may be best to seek professional help. They have experience and knowledge in dealing with different types of stains and can provide expert guidance on how to safely remove them without causing any harm.
3. Not properly preparing the walls before cleaning
Before you start cleaning oil stains from your walls, it’s crucial to properly prepare them. This step is often overlooked but is essential for effective stain removal. By not preparing the walls, you risk spreading the stain or damaging the paint.
To avoid this, make sure to clean any dust or debris off the surface before applying any cleaning solution. Additionally, protect surrounding surfaces with a drop cloth or tape to prevent accidental damage.

Taking these precautions will ensure that your cleaning efforts are successful and won’t cause any additional problems.
4. Not allowing enough time for the cleaning solution to work
It is important to give the cleaning solution enough time to work on the oil stains. Rushing through the cleaning process can result in ineffective stain removal and may require additional effort later on.
Take the time to thoroughly apply the cleaning solution to the stained areas and let it sit for a few minutes or as instructed by the product’s manufacturer. This allows the solution to penetrate and break down the oil, making it easier to remove.
Remember, patience is key when dealing with stubborn oil stains on walls.
Preventive Measures to Avoid Oil Stains on Walls
To avoid oil stains on your walls, use a protective covering when cooking or working with oil-based materials. Clean up spills immediately and regularly maintain the walls to prevent build-up.
Consider using a stain-resistant paint or coating on high-risk areas. Read more to discover effective tips and tricks for the successful removal of oil stains from walls and learn about common mistakes to avoid.
1. Use a protective covering or barrier when cooking or working with oil-based materials
To prevent oil stains on your walls, here are some preventive measures you can take:
- Place a protective covering or barrier, such as a plastic sheet or aluminum foil, on the wall behind your stove or cooking area.
- Use a splatter screen or grease guard when frying or sautéing foods to minimize oil splatters.
- Consider installing a backsplash made of materials that are easy to clean, such as tile or stainless steel.
- If you’re working with oil-based paints or other materials that could potentially stain the walls, use drop cloths or tarps to protect the surrounding areas.
- Regularly check for any drips or spills and clean them up immediately before they have a chance to seep into the wall.
2. Clean up spills immediately
To prevent oil stains from setting in and damaging your walls, it’s important to clean up spills immediately. Oil can quickly soak into the surface of the wall, making it difficult to remove later on.

By wiping up spills right away with a clean cloth or paper towel, you can minimize the chances of permanent staining. This simple step can save you time and effort in the long run by preventing the need for more extensive cleaning or repainting.
So remember, act fast when accidents happen and keep your walls looking fresh and stain-free.
3. Regularly clean and maintain the walls to prevent build-up
To keep your walls looking fresh and stain-free, it’s important to regularly clean and maintain them. By doing so, you can prevent the build-up of dirt, grime, and oil stains. A simple way to clean your walls is by using a mixture of mild detergent or dish soap with warm water.
Gently wipe down the surface using a soft cloth or sponge, making sure to remove any oily residue. Remember to rinse the walls thoroughly with clean water and dry them completely afterward to avoid streaks or moisture damage.
By taking these preventive measures, you can keep your walls in great condition and minimize the chances of oil stains becoming stubborn or difficult to remove later on.
4. Consider using a stain-resistant paint or coating on high-risk areas
To prevent oil stains on walls, it’s a good idea to use a stain-resistant paint or coating. These specialized products create a protective barrier that makes it easier to clean and remove oil stains.
They are particularly useful in high-risk areas like kitchens or workshops where splatters and spills are more likely to occur. By using this type of paint or coating, you can minimize the chances of oil stains setting in and make cleaning up much simpler.
Regular maintenance and cleaning will also help keep your walls looking fresh and stain-free.
Conclusion
To successfully paint over oil stains on your walls, follow these tips: prepare the walls properly, use a stain-blocking primer, choose the right paint type, apply multiple coats with drying time in between, and use proper painting techniques.
When removing oil stains from walls, consider factors like stain type and wall condition. Avoid mistakes like using harsh cleaners or scrubbing too hard. To prevent oil stains, use protective coverings, clean up spills immediately, regularly maintain the walls, and consider stain-resistant coatings.
By following these steps and being proactive, you can easily deal with oil stains on your walls.
FAQs

1. How can I remove oil stains from my walls?
You can use a grease-fighting cleaner or a mix of dish soap and water to scrub vigorously at the stain on your painted drywall or plaster stains for an effective result.
2. What tips do you have for painting over wall stains?
When removing stains from walls, it’s best not to rush through the process; after cleaning, allow the wall sufficient time to dry completely before applying paint using tested wall painting techniques.
3. What mistakes should I avoid when removing oil stains?
Common mistakes in stain removal include failing to test cleaners on hidden spots first and neglecting preventive measures that could guard against more oil splatters on your walls.
4. Are there specific factors that make removing some types of wall-stains more difficult?
Yes! Oil-based paints are notoriously stubborn compared with mildew or other common household smudges, and thus may require specialized solutions for removing grease stains off your walls.
5. Can these methods work for all types of wall stains?
While these tips and tricks are particularly useful for tackling oily grime, they also apply broadly to other forms of discoloration like mildew wall stain removal as well.